


In the world of backend development, managing files is a fundamental task. Whether it's reading data from files, uploading user-generated content, or organizing your server's storage, understanding file handling is essential. In this guide, we'll explore file handling in Node.js using TypeScript, focusing on the core operations:
Reading Files 📚: Learn how to read data from files stored on your server.
Writing Files 📝: Explore techniques to write and save data into files.
File Uploads 🚀: Understand the process of accepting and handling file uploads from clients.
File Deletion 🗑️: Master the art of removing files you no longer need.
File Renaming 🔄: Learn how to rename files for better organization.
Reading Directories 📂: Navigate through directories to manage multiple files efficiently.
So before we start let's create a server and do some imports:
import express, { Request, Response } from "express";
import fs from "fs/promises";

const PORT = 3000;

const app = express(); // creating the server
app.use(express.json()); // middleware to read content of the body

app.listen(3000, () => {
    console.log(`Server started at port ${PORT} `);
});
After this, we will be diving into the code and looking at how we can perform such operations on files using typescript:
Reading a File 📚
Time to read a file named
data.txtthat is on our server and here is how we do it. Firstly we import thefsmodule provided by nodejs and then we create aGETroute at "/data" and now finally write an asynchronous callback function within which we are going to for fs.readFile() to finish reading the data from our file and once it's read we send that data as a response.
// Endpoint to read data from "data.txt" file
app.get("/data", async (req: Request, res: Response) => {
    try {
        const data = await fs.readFile("data.txt", "utf-8");
        res.send(data);
    } catch (error) {
        console.log(error);
        res.status(500).send("Internal server error");
    }
});
Writing to a File✍️
To write in a file we first import the
fsmodule and create a route/write. Now we destructure the message to be written in the file and write it in theoutput.txtfile.
app.post('/write', async (req: Request, res: Response) => {
  try {
    const { message } = req.body;
    // Write data to the file asynchronously
    await fs.writeFile('output.txt', message, 'utf-8');
    res.status(200).send('Data written successfully');
  } catch (error) {
    console.error(error);
    res.status(500).send('Internal server error');
  }
});
Reading a Directory📁
When we read a directory we get an array that contains names of all the files in the directory. Here in the code, we can see the "files" variable reads the directory "./" which is the root directory that gives us an array containing all the files in our root folder.
 app.get('/files', async (req: Request, res: Response) => {
   try {
     // Read the list of files in the directory asynchronously
     const files = await fs.readdir('./');
     res.json({ files });
   } catch (error) {
     console.error(error);
     res.status(500).send('Internal server error');
   }
 });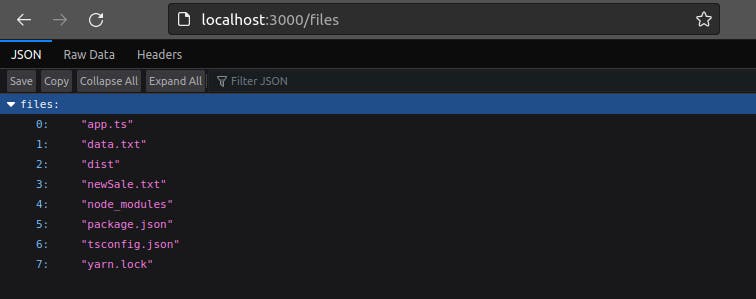
Uploading a Single File📄
We will be using a library "multer" so let's see in the code how we do it:
import multer from 'multer'; // we import the library

// Defining storage location for the uploaded files:
const storage = multer.diskStorage({
    // we define destination where the file will be saved in server
    destination: (req: Request, file, cb) => {
        cb(null, "uploads/");
    },
    // we change the name of the recieved file
    filename: (req: Request, file, cb) => {
        cb(null, file.originalname + "-" + Date.now());
    },
});

// Middlewares:
const upload = multer({ storage }); // multer middleware initailized

app.post('/upload', upload.single('file'), (req: Request, res: Response) => {
  try {
    // req.file is by default present on the request and conatains the content of the file
    const file = req.file;
    if (!file) {
      console.error('File not found');
      return res.status(404).send('File not found');
    }
    res.status(200).send('File uploaded successfully');
  } catch (error) {
    console.error(error);
    res.status(500).send('Internal server error');
  }
});
Downloading a File⬇️
Downloading a file is fairly simple...just go through the code that explains it.
app.get('/download/:filename', async (req: Request, res: Response) => {
  // store the name of the file to be sent for downlaod
  const filename = req.params.filename;
  try {
    // Send the file as a download response
    res.download(`./uploads/${filename}`, (err) => {
      if (err) {
        console.error(err);
        res.status(400).send('File not found');
      }
    });
  } catch (error) {
    console.error(error);
    res.status(500).send('Internal server error');
  }
});
Deleting a File❌
To delete a file we store the name of the file we recieve from the request and then use
fs.unlinkas follows to delete a file from the server.
app.delete('/file/:filename', async (req: Request, res: Response) => {
  const filename = req.params.filename;
  try {
    // Delete the file asynchronously
    await fs.unlink(`./uploads/${filename}`);
    res.status(204).send('File deleted successfully');
  } catch (error) {
    console.error(error);
    res.status(500).send('Internal server error');
  }
});
Renaming a File✍🏻
Just destructure the new and old name of the file then use
fs.renamemethod to rename the file as follows.
app.post('/file/rename', async (req: Request, res: Response) => {
  // destrucutur the old and new name of the file to be
  const { oldFilename, newFilename } = req.body;

  try {
    // Rename the file asynchronously
    await fs.rename(`./uploads/${oldFilename}`, `./uploads/${newFilename}`);
    res.status(200).send('File renamed successfully');
  } catch (error) {
    console.error(error);
    res.status(500).send('Internal server error');
  }
});
Updating a File🆕
When a request is received, we extract the target file's name from the parameters. It then prepares the new content, in this case, an HTML template. Using the
fsPromises.writeFilefunction with the write flag ("w"), the server updates the file, replacing its existing content with the new data.
app.put("/file/:filename", async (req: Request, res: Response) => {
    try {
        const filename = req.params.filename;
        const data = `<!DOCTYPE html>
        <html lang="en">
        <head>
            <meta charset="UTF-8">
            <meta name="viewport" content="width=device-width, initial-scale=1.0">
            <title>Document</title>
        </head>
        <body>

        </body>
        </html>`;

        await (fsPromises as any).writeFile(`./${filename}`, data, { flag: "w" }); // Using type assertion here
        console.log(`File "${filename}" updated`);
        res.status(200).send("File updated");
    } catch (error) {
        console.error(error);
        res.status(500).send("Internal Server error");
    }
});
In conclusion, this guide has provided a foundational understanding of working with files in Node.js using TypeScript. We've explored fundamental operations such as reading, writing, uploading, deleting, renaming files, and navigating directories. Remember, the possibilities with file handling in Node.js are vast and deeply depend on your specific use case.
As you delve deeper into your projects, always consider the unique requirements of your application. Node.js's official documentation, along with TypeScript resources, will be invaluable companions on your coding journey. Be curious, experiment, and leverage the vast resources available in the development community. Happy coding! 🚀📂